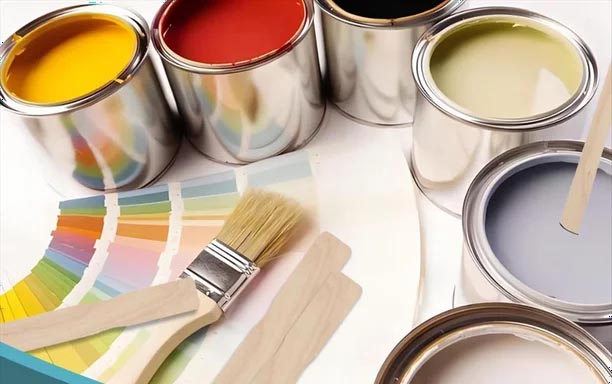
Achieving a smooth, durable, and beautiful paint job has nothing to do with how expensive your brush is and everything to do with how well you mixed your paint. Proper mixing, or homogenization, is the non-negotiable foundation of professional results. It re-integrates the pigments, resins, and solvents that have settled during storage, ensuring consistent color, sheen, viscosity, and coverage across your entire project.
This comprehensive guide is your ultimate resource for understanding the tools of the trade. We will dissect the three primary types of paint stirrers—the humble handheld, the powerful electric, and the versatile drill-attachment—leaving no question unanswered. By the end, you’ll know exactly which tool is the right investment for your needs, saving you time, money, and immense frustration.
Before we dive into the paint mixing tools, let’s understand the “why” on a deeper level. Paint is a complex chemical mixture. Over weeks or months of sitting on a shelf, its components separate based on density:Pigments are the heaviest and sink to the bottom.Binders/Resins sit in the middle.Solvents rise to the top.
When you fail to mix these components back into a uniform state, you commit to a project with unpredictable results:
Inconsistent Color: The first half of your wall will be a different shade than the second half because you’re painting with more solvent at the start and more pigment at the end.
Poor Adhesion and Durability: Without the proper blend of resins, the paint film may not form correctly, leading to premature chipping, peeling, or fading.
Uneven Sheen: The gloss or matte finish will appear patchy and irregular.
Clogged Application Tools: Unmixed clumps of pigment will get stuck in your roller nap or brush bristles, creating a terrible application experience and ruining your tools.
Reduced Coverage: Unmixed paint lacks its full hiding power, meaning you’ll need more coats to achieve a solid color, wasting time and product.
Simply shaking the can is never enough. The immense force required to re-integrate settled pigment, especially in thick latex or oil-based paints, can only be achieved through mechanical stirring. This is where choosing the right tool becomes critical.
These are the most basic and universally recognized stirring tools. Typically made from pine wood, laminated cardboard, or plastic, they are often provided for free when you purchase a can of paint. They feature a flat paddle or elongated design at one or both ends.
Extreme Cost-Effectiveness: This is their primary advantage. They are incredibly cheap to produce and purchase. For a single, tiny project, the cost of $0 is hard to beat.
Universal Availability: You can find them at any hardware store, home center, or even big-box supermarket. There is no need for specialty shopping.
Disposable and Zero Cleanup: After use, you simply throw it away. There’s no worrying about cleaning dried paint out of intricate machinery or blades. This makes them seemingly convenient for quick tasks.
No Power Required: They are always operational. There are no batteries to charge or cords to find, making them usable anywhere, anytime.
Extremely Labor-Intensive and Time-Consuming: Mixing a single gallon of moderately separated paint by hand can take 5-10 minutes of vigorous, non-stop stirring to achieve a mediocre result. For a 5-gallon bucket, it’s a nearly Herculean task that will leave your arm feeling like jelly.
Ineffective Homogenization: It is almost impossible to scrape the perfectly settled pigment from the very bottom and corners of the can. The flat paddle design glides over the toughest clumps, leaving them undisrupted. The result is often a paint mixture that seems mixed but is still full of microscopic clumps that will reveal themselves on your wall.
Inconsistent Results: The quality of the mix is entirely dependent on your stamina and effort level. Fatigue sets in quickly, leading to an incomplete job.
Handheld stirrers have a very narrow, but valid, use case. They are suitable only for:
Very small touch-up jobs where you are using less than a quarter of a can.
Briefly re-mixing a can of paint that was mixed perfectly by a machine just hours before and has only experienced minimal separation.
The absolute DIY novice who is doing a one-time, small project and has no other tools available.
Verdict: A handheld stirrer is better than nothing, but just barely. For any serious project, it is a false economy that compromises the entire endeavor.
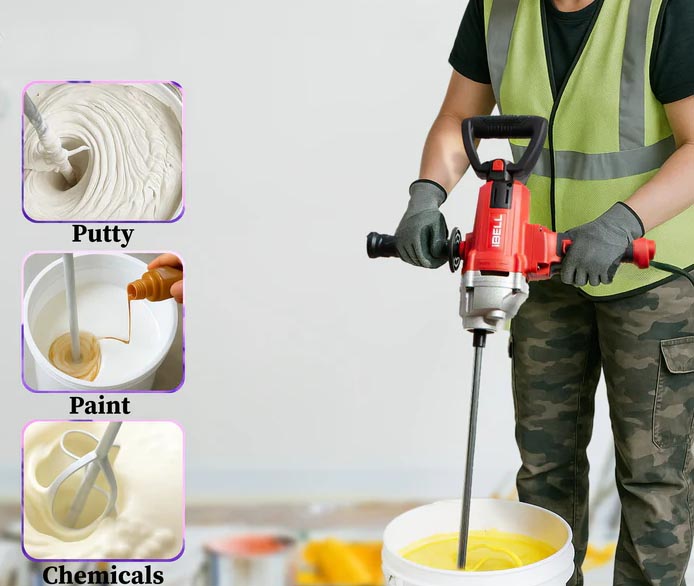
These are purpose-built, standalone power tools designed exclusively for mixing paint. They consist of a motor unit, a long, slender metal shaft, and a specialized spiral or propeller-shaped mixing blade at the end. The design allows the blade to be fully submerged without splashing.
Unmatched Effortlessness and Speed: This is their killer feature. A quality paint mixer electric can homogenize a completely separated gallon of paint in 30 to 60 seconds. It does the work for you, saving immense time and physical exertion. For a 5-gallon bucket, it might take two minutes—a task that would be virtually impossible by hand.
Superior Mixing Performance:The high-RPM spinning action of the spiral blade creates a powerful vortex that pulls material from the very bottom of the container and forces it upward, creating a perfect, clump-free homogenization. The results are consistently professional.
Reaches Every Corner: The long shaft and aggressive blade design are engineered to scrape the sides and bottom of the container as they spin, ensuring no pigment is left behind.
Ergonomic and Splash-Resistant: They are designed for comfort and feature designs that minimize splashing, keeping your workspace clean. Many models have variable speed controls for handling different viscosities.
Higher Initial Investment: A good electric paint stirrer is a dedicated tool that requires an upfront cost, typically ranging from $50 to $150+.
Requires Power: Cordless models need to be charged, and corded models need an outlet nearby. If the battery dies mid-job, you’re stuck waiting.
Another Tool to Store: For someone with limited workshop space, a single-use tool can be a storage inconvenience.
Electric stirrers are the ideal choice for:
Professional painters and contractors who mix paint daily. The time savings alone pay for the tool very quickly.
Serious DIY enthusiasts who frequently undertake painting projects and value their time and the quality of the finish.
Anyone who needs to mix large volumes (e.g., 5-gallon buckets) or high-viscosity products like thick porch paint, deck stains, or joint compound.
Users who prioritize perfect results and want to eliminate the variable of human error from the mixing process.
Verdict: The electric paint stirrer is the ultimate tool for quality and efficiency. It is a productivity powerhouse that guarantees a perfect mix every time.
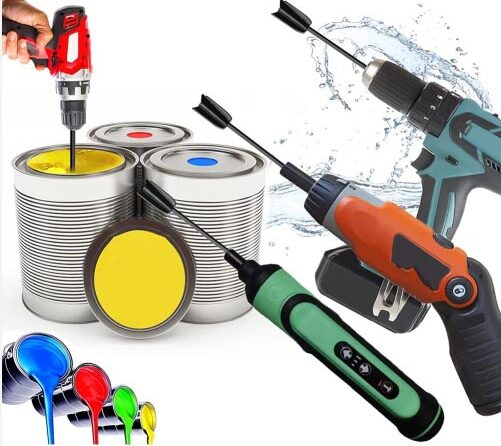
These are not standalone tools but accessories designed to convert a standard power drill (handheld or stationary) into a powerful paint mixer. They consist of a mixing blade (often a spiral or two-loop design) mounted on a shaft that ends in a hex shank, which is securely chucked into a drill.
Except Value for Money: If you already own a power drill (and most DIYers do), this is the most cost-effective path to powerful mixing. The attachments themselves are very inexpensive, often between $5 and $20.
Raw Power: A half-inch drill provides tremendous torque, easily handling the thickest paints and largest volumes. It rivals the power of dedicated electric mixers.
Extreme Versatility: Your drill is now a multi-tool. You can use it for drilling, driving screws, and now mixing paint, maximizing the utility of a single investment.
Ideal for Large Containers: The long shafts available are perfect for reaching the bottom of 5-gallon buckets and deep drums.
Requires a Drill: This option is useless if you don’t already have a suitable drill. Purchasing a drill just for mixing negates the cost advantage.
Potential for Aerating Paint: The high torque of a drill can easily whip too much air into the paint if used at high speeds, creating bubbles and foam. These bubbles can then be transferred to your wall, creating a pockmarked finish. This requires careful speed control.
Awkward for Small Cans: Using a heavy, powerful drill to mix a quart of paint is overkill and can be clumsy, increasing the risk of splashing.
Drill Wear and Tear: Constantly using your drill for mixing can put strain on its motor and gears, potentially shortening its lifespan, especially if it’s a lighter-duty model.
Drill attachments are the perfect sweet spot for:
The Pragmatic DIYer who already owns a sturdy drill and wants an affordable way to tackle medium to large projects effectively.
Anyone mixing large volumes (like entire 5-gallon buckets) on an occasional basis.
Users who have limited storage space and prefer multi-purpose tools over single-use gadgets.
Pro Tip for Drill Use: ALWAYS use your drill on its lowest speed setting. Start slowly, submerge the blade, and then gradually increase speed only as needed to create a vortex. This prevents bubbles and dangerous splashing.
Verdict: The drill-attachment method offers professional-grade results at a bargain price, provided you have the drill and the patience to use it carefully.
|
Feature |
Handheld Stirrer |
Electric Stirrer |
Paint Mixer Drill Attachment |
|
Mixing Speed |
Very Slow (5-10+ mins) |
Very Fast (30-60 secs) |
Fast (60-90 secs) |
|
Ease of Use |
High Effort, Tiring |
Minimal Effort, Easy |
Moderate Effort, Requires Care |
|
Mixing Quality |
Poor to Fair |
Excellent |
Excellent (with care) |
|
Ideal For |
Touch-ups, small jobs |
Pros, frequent use, large volumes |
DIYers with drills, large volumes |
|
Splash Risk |
Low |
Low |
Moderate to High |
|
Portability |
High |
Moderate (requires power) |
Low (requires drill & power) |
No matter your tool, these tips will ensure success:
The “Grid” Method: Don’t just spin in circles. Move the mixer in a slow, methodical up-and-down and side-to-side pattern to ensure every corner of the can is scraped and blended.
Clean Immediately: The moment you finish mixing, wipe the blade and shaft clean with a rag before the paint has any time to dry. For water-based paints, a quick rinse under a faucet is sufficient.
Mind the Splash: Before removing the spinning mixer from the can, briefly lift it just above the surface and let it spin for a second to fling any excess paint back into the can instead of onto your floor.
Let it Rest: After mixing, let the paint sit for 15-30 minutes. This allows any incorporated air bubbles to rise to the surface and pop, preventing a bubbly application.
Stir, Don’t Shake: Shaking a paint can forces air into the paint and is less effective than stirring. Always prefer paint stirring.
Q: How long do you need to mix paint with a drill?
A: For a standard gallon can that has been sitting, mix on a low speed for 60-90 seconds, using an up-and-down motion to ensure you scrape the bottom. The paint should be a completely uniform color and consistency with no streaking on the stirrer.
Q: Can you overmix paint?
A: It’s very difficult to “overmix” in terms of chemistry, but you can definitely over-agitate it. Using too high a speed, especially with a drill, can whip excess air into the paint, creating bubbles and foam. Mix only until it’s perfectly uniform.
Q: What is the best paint stirrer for a 5-gallon bucket?
A: Both a long-shaft electric paint stirrer and a long-shaft drill attachment are excellent choices. The key is a shaft long enough to reach the bottom without submerging your tool. Avoid handhelds for this task entirely.
Q: Do I need to stir paint that says “no stir” or “self-mixing”?
A: Yes, you absolutely should. While these paints are formulated to separate less, they still do. Always stir them, even if just for a minute. “No stir” is a marketing term, not a guarantee of perfect homogenization straight from the can.