Even if the paint looks uniform, the components separate over time. Heavier pigments sink to the bottom (sedimentation), while solvents and binders rise to the top. Failure to stir paint properly is one of the most common causes of a failed paint job, leading to:
Inconsistent color: The bottom of the can will be much more pigmented.
Uneven sheen: Gloss or matte finishes can become blotchy.
Poor coverage and adhesion: The paint won’t apply or wear correctly.
These are the most common and are often provided for free when you buy paint.
Wooden Paint Stirrers:
Description: The classic, flat, paddle-like sticks made of pine or similar wood.
Best For: Small to medium jobs (1-gallon cans), mixing custom colors in the store, and general-purpose stirring.
Pros: Cheap (often free), disposable, biodegradable.
Cons: Can splinter, not very strong for thick paints, not reusable.

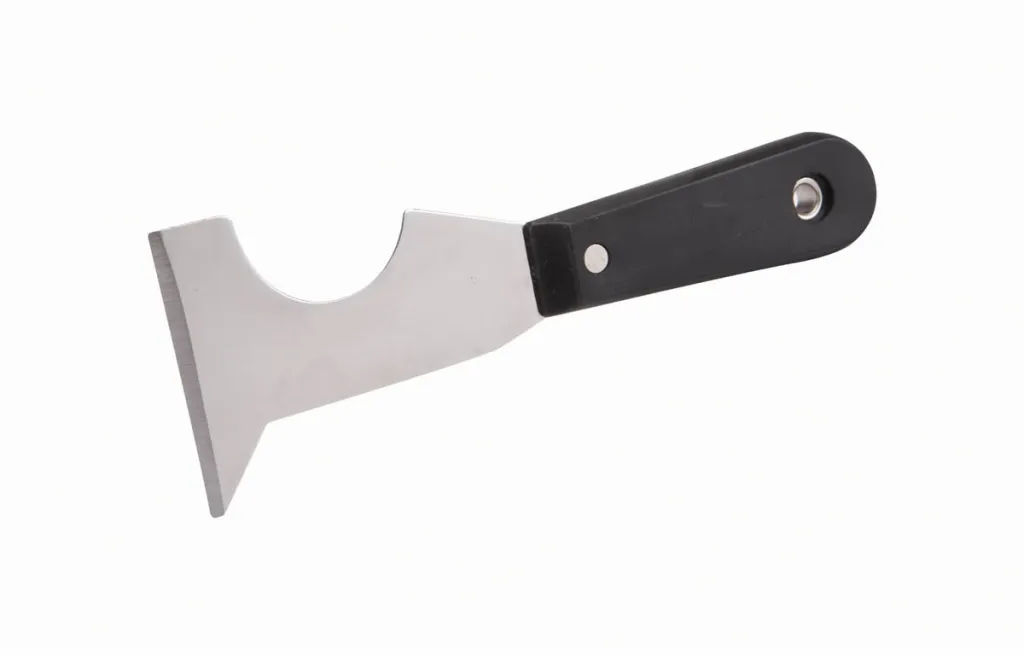
5-in-1 Painter’s Tool:
Description: A versatile metal tool with a built-in stirrer edge.
Best For: Professionals and serious DIYers who already have this multi-tool on hand.
Pros: Extremely durable, great for scraping the bottom and sides of the can, multi-functional.
Cons: More expensive, requires cleaning after use.
These attach to a power drill and make the job incredibly fast and thorough.
Drill-Mounted Paint Mixers:
Description: Metal or hard plastic paddles with a spiral or winged design that attaches to a drill chuck.
Best For: Large jobs (5-gallon buckets), thoroughly mixing old or heavily separated paint, stirring thick primers and elastomeric coatings.
Pros: Extremely fast and effective; the only way to properly mix a 5-gallon bucket. Reusable.
Cons: Requires a drill, can introduce air bubbles if overused, must be cleaned after use.
Pro Tip: Run the mixer in both forward and reverse directions to ensure everything from the bottom and sides is incorporated.
Dedicated Paint Mixing Machines:
Description: Usually found in paint stores, these are powerful machines that clamp onto a can and shake or oscillate at high speed.
Best For: Paint stores for custom color matching. Not practical for home use.
Mixing Balls (Stirring Balls):
Description: Small, stainless steel or plastic balls (like ball bearings) that you drop into the paint can.
Best For: Spray guns, paint cans that will be shaken (e.g., in a paint shaker), and touch-up cans. They are also fantastic for shaking gallon cans by hand as they help agitate the settled pigment.
Pros: Reusable, highly effective for hand-shaking, help prevent skinning if left in the can.
Cons: Can get lost, must be fished out and cleaned if you need to pour paint.
The “Improvised” Stirrer:
Description: A clean stick from the yard, a clean piece of PVC pipe, or even a clean hand-mixer (for cooking, to be dedicated to paint afterwards).
Best For: Emergencies when you have nothing else.
Warning: Ensure anything you use is perfectly clean and dry to avoid contaminating your paint.
Prepare the Can: Wipe the lid and lip clean to prevent dirt from falling in. Pry the lid open completely using the flat end of a paint can key or a screwdriver.
Initial Stir: Pour off any clear liquid that has risen to the top back into the can (this is the binder/solvent, not water!). Use your stirrer to pry the thick pigment off the bottom of the can. “Cut” through the paint like you’re slicing through clay.
Stir Thoroughly:
Manual Method: Use a figure-8 motion, scraping the bottom and sides of the can continuously. Fold the paint from the bottom over the top. This should take 2-3 minutes for a well-separated gallon.
Drill Method: Insert the mixer all the way to the bottom. Turn the drill on at a low to medium speed. Slowly move the mixer around the can, tracing the sides and bottom. Mix for 30-60 seconds. Avoid high speeds, which whip air into the paint.
Check for Consistency: Lift the stirrer out. The paint should drip off uniformly with no streaks of different color or consistency. Check for any unmixed clumps at the bottom.
Final Tip: For the most consistent results, “box” your paint. This means pouring all of it back and forth between two containers (e.g., two empty, clean gallon cans) to ensure it’s perfectly homogenous.
1. Clamping Section
This is the section that connects the agitator directly to the drill and serves as the “power input” for the entire tool.
Function: It is a hexagonal steel handle, typically in standard sizes of ¼ inch or 3/8 inch, ensuring it can be securely gripped by the chuck of most hand drills or impact drills.
Importance: If it is not securely gripped, it can slip during high-speed rotation, resulting in ineffective torque transmission and even a dangerous situation.
2. Drive Rod
This is the metal rod that connects the clamping section to the mixing blade.
Function: It transmits the rotational torque generated by the drill. Its length determines the depth of the container the agitator can reach.
Material and Design: Typically made of sturdy galvanized steel or stainless steel, it provides a certain degree of rigidity to prevent bending under high resistance. Some models have a telescopic or adjustable drive rod to accommodate buckets of varying depths.
3. Paddle
This section directly contacts the material and performs the mixing task, representing the essence of the design. Its shape directly determines the efficiency and effectiveness of mixing.
Function: Generates fluid motion, stirring sediment at the bottom upward for uniform mixing.
Common Types:
Spiral Wing: The most common design. One or two pairs of angled, curved wings create powerful downward or upward vortices, effectively lifting materials from the bottom.
Paddle: Similar to an aircraft propeller, it focuses more on radial mixing and is suitable for medium-to-low viscosity liquids.
Material: Typically integrally molded with the drive shaft or connected using high-strength welds, the material is also corrosion-resistant galvanized steel or stainless steel.
Compared to traditional manual mixing, the advantages of electric mixers are overwhelming:
Ultimately efficient, saving time and effort
Advantage: This is the core advantage. Thoroughly stirring a 5-gallon (approximately 19-liter) paint bucket manually is not only laborious but also time-consuming. When connected to a power drill, an electric mixer typically completes mixing in just 30 to 60 seconds, significantly reducing preparation time and labor intensity.
Thorough and uniform mixing
Advantage: Manual mixing makes it difficult to completely scrape away thick, sticky pigment deposits from the bottom of the bucket, leaving dead spots. Electric mixers, through high-speed rotation, create powerful vortexes that thoroughly scrape away all deposits from the bottom and walls of the bucket, ensuring a thorough mixing of pigment, resin, and solvent, resulting in an absolutely consistent color and texture. This is something manual mixing simply cannot achieve.
Ability to handle highly viscous materials
Advantage: For extremely viscous products such as epoxy floor paint, thick primers, elastic sealants, and putty, manual mixing is nearly impossible and can even break the wooden stick. Electric stirrers, with their powerful torque, can easily handle these high-viscosity materials.
Versatile
Advantages: They can be used not only for stirring paint, but also for a variety of liquids or viscous substances that need to be mixed, such as:
Fertilizers and pesticides for gardening
Wood finishes and varnishes
Epoxy resin adhesives
Even large containers of cooking ingredients (specialized food-grade tools are required)
The value of electric stirrers is fully demonstrated in the following scenarios:
Large Projects (5-Gallon Buckets of Paint)
Scenario Description: Renovating an entire house, painting a large office, or painting a warehouse floor all require large buckets of paint.
Why It’s Essential: Manually stirring a 5-gallon bucket is impractical and ineffective. An electric stirrer is the only tool that can efficiently and thoroughly complete this task, and it’s a standard tool for professional painters.
Stirring Old Paint that Has Been Stored for a Long Time
Scenario Description: Finding a half-empty bucket of paint from a year ago in the corner of the garage reveals that it has severely separated, with the pigment at the bottom hardened and crusted.
Why it’s essential: Manual stirring is nearly impossible to salvage this type of paint. The powerful force of an electric stirrer can break up any caked-on sediment and remix it, saving material that would otherwise be wasted.
Mixing high-viscosity or specialty paints
Scenario: Epoxy floor paint, high-solids primer, thick anti-corrosion paint, or paints that require mixing A and B components.
Why it’s essential: The viscosity of these materials makes manual stirring impractical. Only an electric stirrer can provide sufficient power to achieve uniform mixing and ensure performance and quality.
Applications requiring frequent stirring
Scenario: During long application periods, paint (especially dark paints or those with metallic or pearlescent powders) can continue to settle. To ensure consistent color, re-stirring is necessary at regular intervals.
Why it’s essential: Manual stirring for several minutes each time is tiring and disrupts workflow. An electric stirrer can be plugged in and started in just a few seconds, significantly improving productivity.
Professional Work Requires Ultimate Uniformity
Applications: Automotive painting, high-end furniture finishing, and art creation all place extremely high demands on color uniformity and paint texture.
Why It’s Essential: Any uneven mixing will result in uneven color or gloss in the finished product. Electric mixers provide laboratory-grade mixing uniformity that’s impossible to achieve manually.